Neuroglancer
Neuroglancer is web-based image viewer for volumetric data. Neuroglancer renders data from OME-Zarr files, which are optimized for storing large, n-dimensional arrays in the cloud. You can use Neuroglancer to view a wide range of imaging data released by the Allen Institute for Brain Science.
Neuroglancer UI
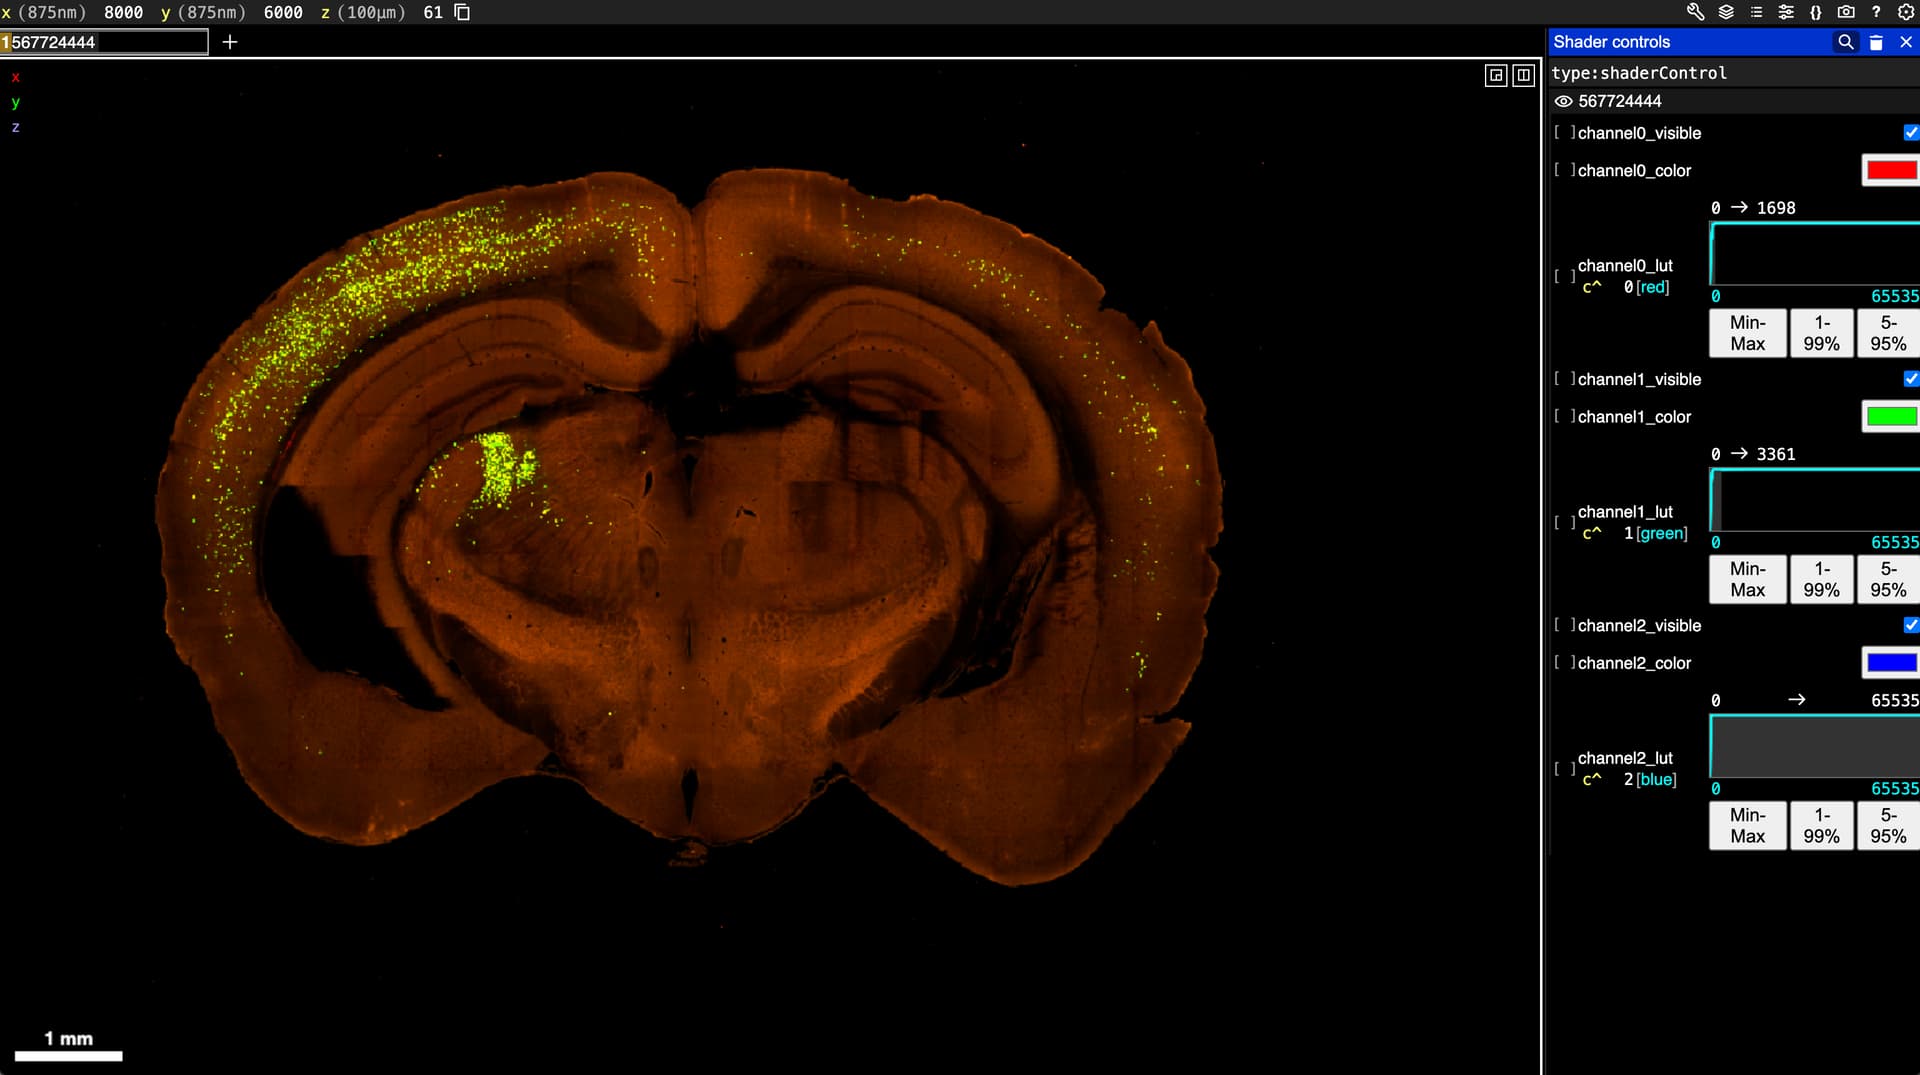
Adjust color channels in Neuroglancer
Use the invlerp controls in the Shader Controls panel to adjust each individual color channel. Use the channel_visible check boxes to enable or disable channels.

Useful Mouse & Keyboard Shortcuts
Clicking on the “?” icon in the upper righthand corner of the Neuroglancer UI will bring up a full list of keyboard shortcuts - this list contains a subset of frequently used shortcuts. To get the most out of these shortcuts, we recommend using Neuroglancer with a mouse.
-
a - toggle axis lines (red and green crosshairs) at center of field-of-view
-
b - toggle scale bar
-
e - rotate image left
-
r - rotate image right
-
ctrl+scroll (pinch on trackpad) - zoom in and out
-
scroll - move through Z-direction
-
right-click (double click on trackpad) - center something in Data View
-
left-click + drag - pan across Data View
Screenshot Tool
Neuroglancer allows users to capture high-resolution images of the Data View, avoiding the need to take screenshots. You can use the screenshot tool to save images for use outside of Neuroglancer.
- When you have created a view that you want to work with outside of Neuroglancer, click the Camera icon in the upper righthand corner of the screen to open the screenshot tool.
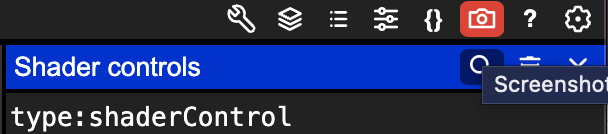
- Follow the instructions on the Screenshot menu to take a screenshot of your Neuroglancer view. Hover over the question mark icons for more details on each step and the information provided by the tool.

- You can now use the “screenshot” for offline viewing and analysis in other tools
Neuroglancer for 3D Volumes
This primer walks users through Neuroglancer features in greater depth, with a focus on using Neuroglancer to explore 3D annotation volumes developed as part of the Human and Mammalian Brain Atlas (HMBA) Consortium
Navigating Neuroglancer — Common Coordinate Framework and Multi-Species Atlas Primer (CCF-MAP)